USB Host On RP2040 – With PIO

1 Share
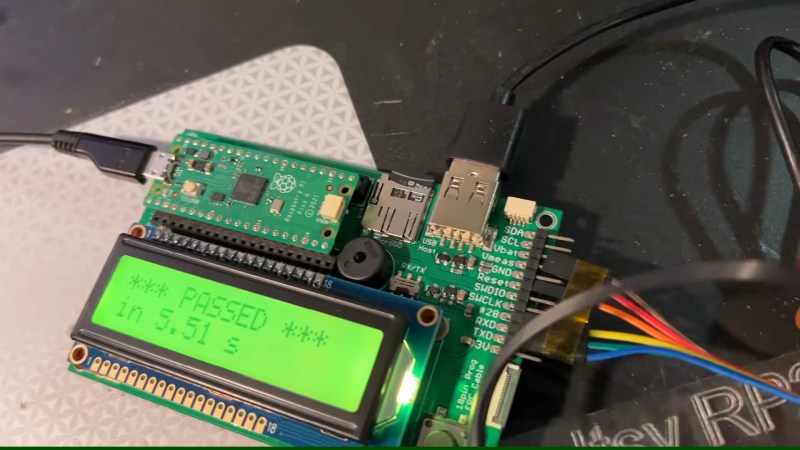
Showing a board with a Pi Pico plugged into it, a USB-A socket marked "USB host", and a character display that says "PASSED" referring to the board being the brains of a testing jig.

Folks from [Adafruit] are showing off a neat hack – USB host on RP2040, using the now-famous PIO peripheral. [Adafruit] builds a lot of RP2040 boards, and naturally, you gotta test them before you ship them to customers. They’ve been using very specific Teensies for that, and at some point, those became unobtainium. Based on the work of [sekigon-gonnoc] and with help of [Thach], they’ve made their TinyUSB library support bitbanging of USB over PIO, and successfully ported their test jig firmware to it!

The base Pico-PIO-USB repo by [sekigon-gonnoc] shows a pretty impressive state of affairs – with low-speed and full-speed USB host and full-speed USB device modes supported, and quite a few examples to get you started. [Adafruit]’s work integrates this code into their TinyUSB stack, specifically focusing on MST (mass storage) features – as this is what you need to program a RP2040. Of course, they also provide a mass storage example to boot!

Test jigs are pretty important to have when making multiple pieces of a board, and with RP2040 supporting more and more interfaces thanks to PIO, it sounds like the perfect chip for your next production testing-intended PCB. With the jig brains taken care of, you’ll want to look into building no less important mechanical part, and we’ve covered quite a few ways to sort that out – here’s an OpenSCAD script that generates lasercutting files out of KiCad boards, or a jig built out of scrap copperclad FR4, and a pretty extensive tutorial on making your own lasercuttable jigs, to boot.

Read the whole story
tekvax
1010 days ago
reply
Burlington, Ontario
Share this story
Delete

Robot Rebellion Brings Back BBC Camera Operators

1 Share

The modern TV news studio is a masterpiece of live video and CGI, as networks vie for the flashiest presentation. BBC News in London is no exception, and embraced the future in 2013 to the extent of replacing its flesh-and-blood camera operators with robotic cameras. On the face of it this made sense; it was cheaper, and newsroom cameras are most likely to record as set range of very similar shots. A decade later they’re to be retired in a victory for humans, as the corporation tires of the stream of viral fails leaving presenters scrambling to catch up.

A media story might seem slim pickings for Hackaday readers, however there’s food for thought in there for the technically minded. It seems the cameras had a set of pre-programmed maneuvers which the production teams could select for their different shots, and it was too easy for the wrong one to be enabled. There’s also a suggestion that the age of the system might have something to do with it, but this is somewhat undermined by their example which we’ve placed below being from when the cameras were only a year old.

Given that a modern TV studio is a tightly controlled space and that detecting the location of the presenter plus whether they are in shot or not should not have been out of reach in 2013, so we’re left curious as to why they haven’t taken this route. Perhaps OpenCV to detect a human, or simply detecting the audio levels on the microphones before committing to a move could do the job. Either way we welcome the camera operators back even if we never see them, though we’ll miss the viral funnies.

Read the whole story
tekvax
1010 days ago
reply
Burlington, Ontario
Share this story
Delete

A Fun Low-Cost Start For Your Macropad Hobby

1 Share
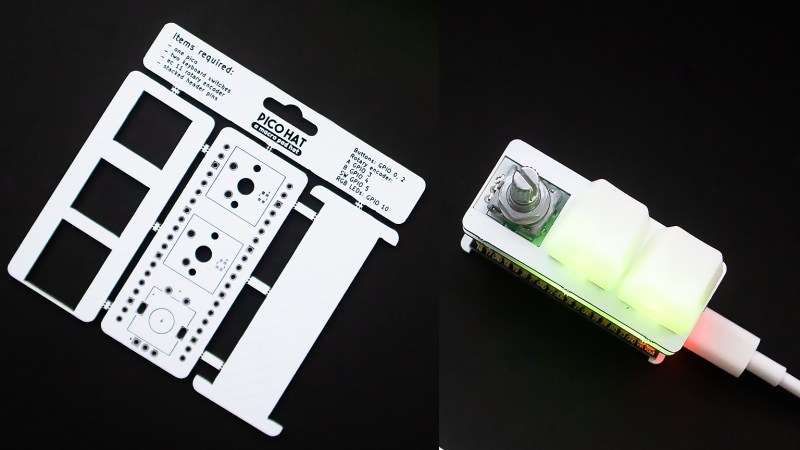
The macropad PCB panel next to an assembled macropad

If you were ever looking for a small relaxing evening project that you could then use day-to-day, you gotta consider the Pico Hat Pad kit by [Natalie the Nerd]. It fits squarely within the Pi Pico form-factor, giving you two buttons, one rotary encoder and two individually addressable LEDs to play with. Initially, this macropad was intended as an under-$20 device that’s also a soldering practice kit, and [Natalie] has knocked it out of the park.

You build this macropad out of a stack of three PCBs — the middle one connecting the Pi Pico heart to the buttons, encoders and LEDs, and the remaining ones adding structural support and protection. All the PCBs fit together into a neat tab-connected panel — ready to be thrown into your favorite PCB service’s shopping cart. Under the hood, this macropad uses KMK, a CircuitPython-based keyboard firmware, with the configuration open-source. In fact everything is open-source, just the way we like it.

If you find yourself with an unexpected affinity for macropads after assembling this one, don’t panic. It’s quite a common side-effect. Fortunately, there are cures, and it’s no longer inevitable that you’ll go bananas about it. That said, if you’re fighting the urges to go bigger, you can try a different hand-wireable Pico-based macropad with three more keys. Come to find that one not enough? Here’s a 2×4 3D printable one.

Now, if you eventually find yourself reading every single Keebin’ With Kristina episode as soon as it comes out, you might be too far gone, and we’ll soon find you spending hundreds of dollars building tiny OLED screens into individual keys — in which case, make sure you document it and share it with us!

Read the whole story
tekvax
1010 days ago
reply
Burlington, Ontario
Share this story
Delete

2022 FPV Contest: ESP32-Powered FPV Car Uses Javascript For VR Magic

1 Share
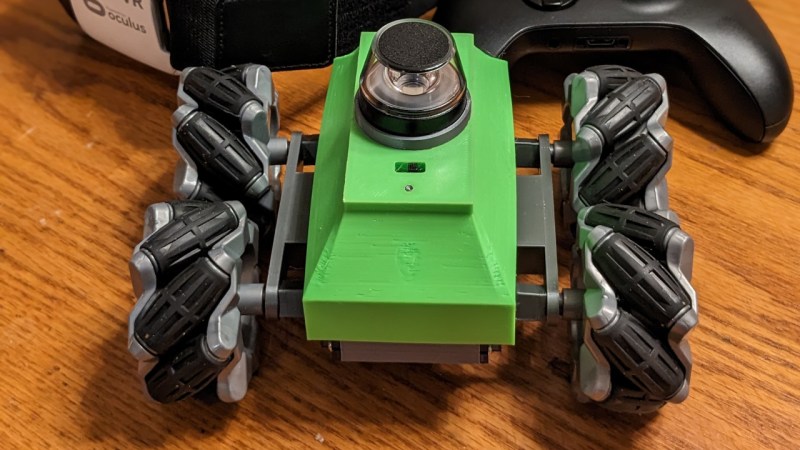
Showing the end result car, with mechanum wheels and a green chassis with what seems to be a camera window on top

You don’t always need much to build an FPV rig – especially if you’re willing to take advantage of the power of modern smartphones. [joe57005] is showing off his VR FPV build – a fully-printable small Mechanum wheels car chassis, equipped with an ESP32-CAM board serving a 720×720 stream through WiFi. The car uses regular 9g servos to drive each wheel, giving you omnidirectional movement wherever you want to go. An ESP32 CPU and a single low-res camera might not sound like much if you’re aiming for a VR view, and all the ESP32 does is stream the video feed over WebSockets – however, the simplicity is well-compensated for on the frontend.

The software stack, served as client-side JavaScript by the ESP32, is what makes this elegant build shine. [joe57005] uses Samsung Gear VR for the projects, a cheap but decent-quality “smartphone holder” VR headset. The ESP32’s camera feed is converted into a faux 3D VR image inside the smartphone’s web browser, using the technology called WebXR , with image de-warping using WebGL, and vanilla JavaScript straightforward touch controls for the HUD. All is open-source and public, and 3D printing files are soon to come to Printables – for now, we get the FreeCad source, which is more than good enough.

If you wanted a self-sufficient FPV platform you could play with, check this one out – it’s seriously accessible, software effort put in is worth learning from, and if you ever wanted to try WebXR, the code provided ought to be a nice playground. It reminds us of an another cute ESP32-driven FPV bot that we’ve seen a few years ago.

Got an FPV idea in mind? We’d like to see it, and we have a contest for that too! Don’t delay bringing it to life!

Read the whole story
tekvax
1010 days ago
reply
Burlington, Ontario
Share this story
Delete

Old-School Video Switching Levels Up With Modern USB Control

1 Share

Video effects and mixing are done digitally today, but it wasn’t always so. When analog ruled the video world, a big switch panel was key to effective results.

VIdeo like this was the result of combining different analog feeds with different effects. The better the hardware, the more was possible.

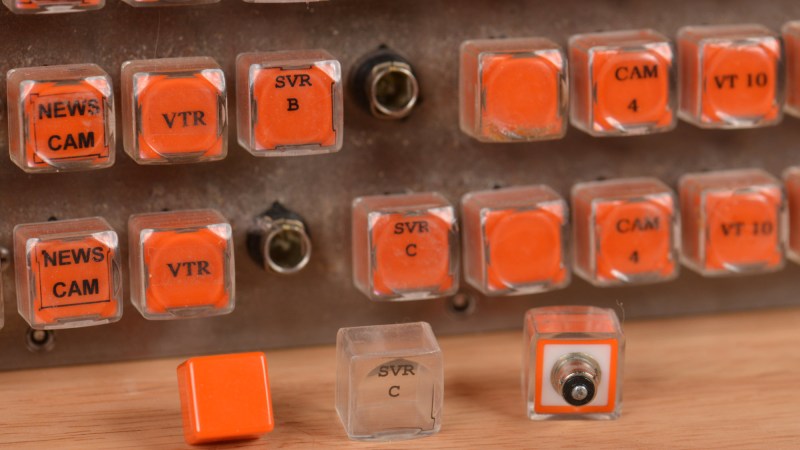
Devices like [Glen]’s Grass Valley Series 300 Crosspoint Switch Panel were an important part of that world. With tools like that, a human operator could set up a composited preview feed in true WYSIWYG style, and switch to live on cue. All done with relatively simple CMOS ICs and buttons. Lots and lots of buttons.

[Glen] reverse engineers the panel to show how it works, and most of the heavy lifting is done by the MC14051B analog multiplexer/demultiplexer, and the MC14532B 8-bit priority encoder. Once that’s figured out, the door is open to modernizing things a little by using a microcontroller to drive the device, turning it into a USB peripheral.

With a little design work, [Glen] builds a PCB around the EFM8UB2 8-bit microcontroller to act as a USB peripheral and control the switch panel, taking care of things like key scanning and lamp control. The last step: a GUI application for monitoring and controlling the panel over USB.

This isn’t [Glen]’s first time interfacing to vintage video mixing and switching, and as many of us know it’s sometimes tricky work to interface to existing hardware. We covered his earlier video switcher project using hardware that was not nearly as easy to work with as this one.

Read the whole story
tekvax
1025 days ago
reply
Burlington, Ontario
Share this story
Delete

Resurrecting PONG, One Jumper Wire At A Time

1 Share

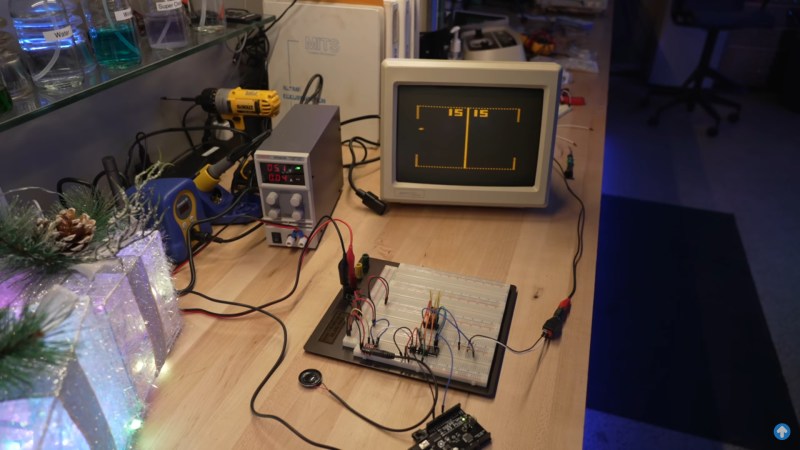
Between 1976 and 1978, over one million Coleco Telstar video game consoles were sold. The Killer App that made them so desirable? PONG. Yep, those two paddles bouncing a ball around a blocky tennis court were all the rage and helped usher in a new era. And as [Dave] of Dave’s Garage shows us in the video below the break, the bringing the old console back to life proved simpler than expected!

Thankfully, the console is built around what [Dave] quite aptly calls “PONG on a chip”, the General Instrument AY-3-8500 which was designed to make mass production of consoles possible. The chip actually contains several games, although PONG was the only one in use on the Coleco.

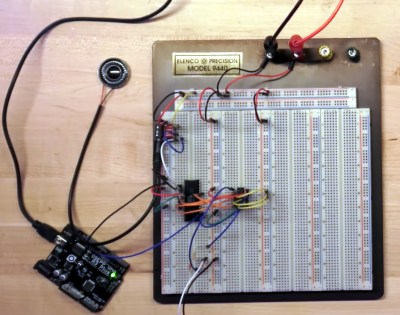
After removing the CPU from the non-functional console, [Dave] breathed life into it by providing a 2 MHz clock signal that was generated by an Arduino, of all things. A typical 2N2222 amplifies the audio, and a quick power up showed that the chip was working and generating audio.

Video is smartly taken care of just as it was in the original design, by combining various signals with a 4072 OR gate. With various video elements and synchronization patterns combined into a composite video signal, [Dave] was able to see the game on screen, but then realized that he’d need to design some “paddles”. We’ll leave that up to you to watch in the video, but make sure to check the comments section for more information on the design.

Is a breadboarded PONG console not retro enough for you? Then check out this old school mechanical version that was found languishing in a thrift store.

Read the whole story
tekvax
1025 days ago
reply
Burlington, Ontario
Share this story
Delete
Next Page of Stories